Contact via the portal
If you got any issues with Inspector Cloud services, you can leave a request for a technical support on our portal. You can get through to the support site from your Instance. To do this, click « Profile» and select « Helpdesk».
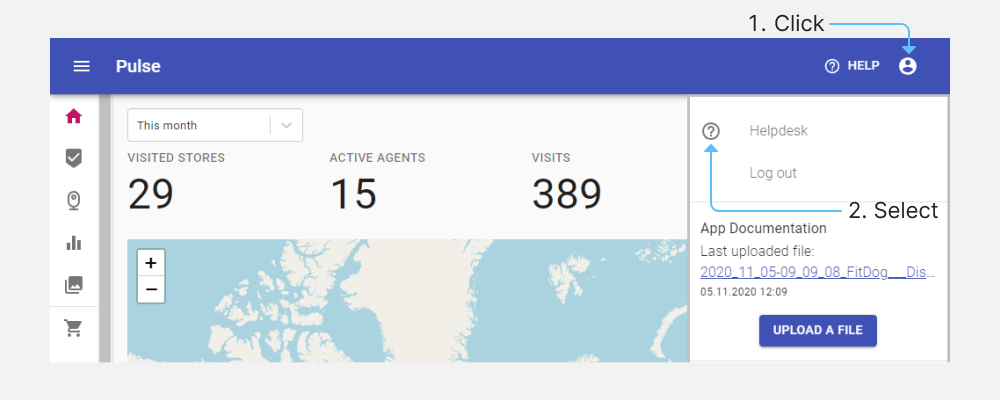
Note
The support site can also be accessed by following the link https://inspector-cloud.zendesk.com.
To keep track of your previous and current requests, we recommend registering.
Registration
- Click «Login» - an authorization form will appear. Select «Sign in».
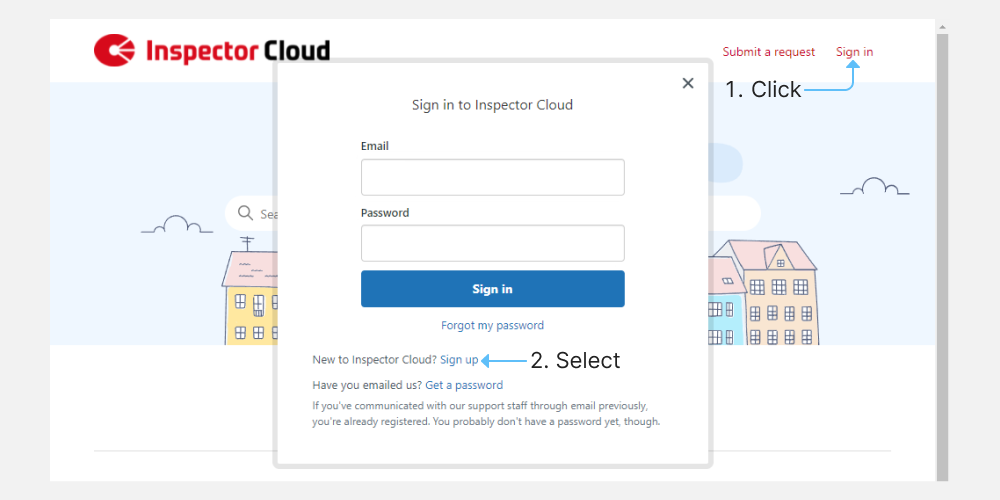
- In the form that opens, fill in the proposed fields and click «Sign in» again.

- An email with a confirmation link will be sent to the email you entered in the form. Read the instructions and follow the link.
- Enter a new password and click «Set Password».
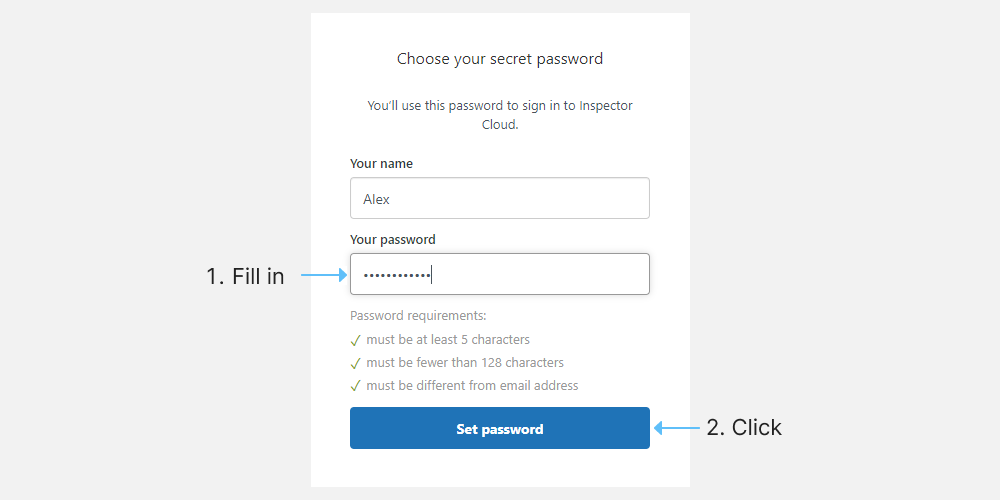
Registration is complete.
Sending a support request
You can send a support request on the portal with or without authorization.
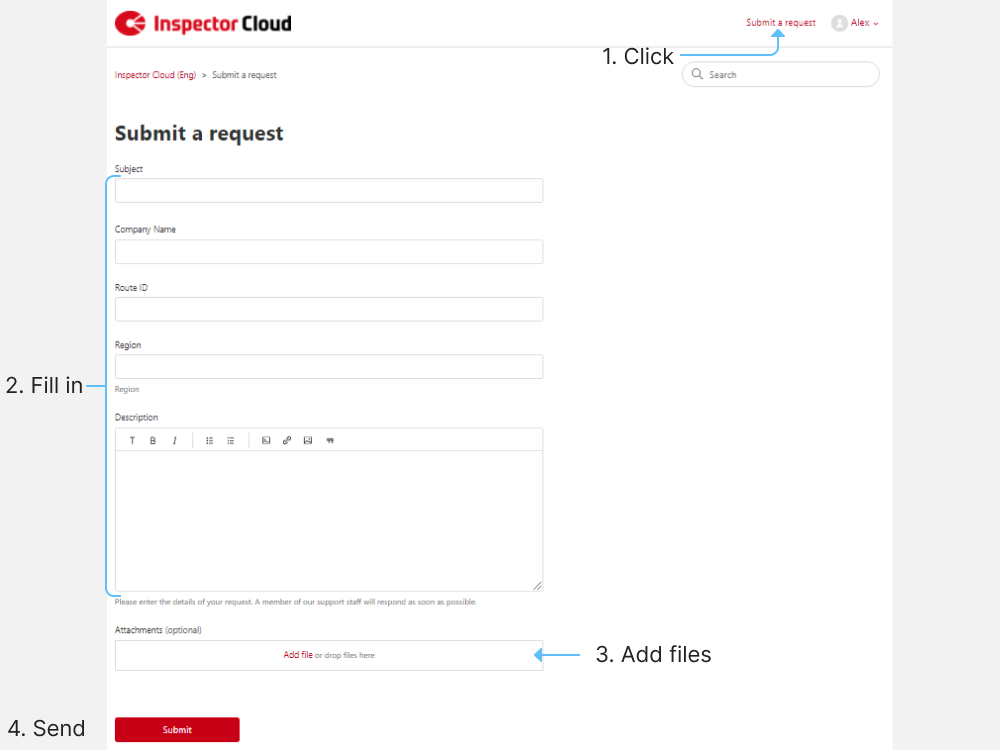
- Click «Submit Request».
- Fill out the request form:
- Subject - briefly describe your issue;
- Company name - indicate the organization in the interests of which you work. If you are an employee of a merchandising agency or a distributor, please include the name of your client;
- Route number - identifier of the route or the covered zone, if you have one;
- Region - the region in which you work;
- Description - describe in detail your question or issue. If the request relates to a specific visit, please indicate its number. If it relates to a secific store - provide its code, name or address.
Note
If you are not authorized on the portal, you need to provide your email for communication.
- If you have screenshots, photos or videos related to your issue, click «Add file» and attach them to the request.
- Click Submit.
Once request has been sent, if you are:
- authorized on the portal - we will contact you by email and in your profile;
- not authorized - we will contact you by email.
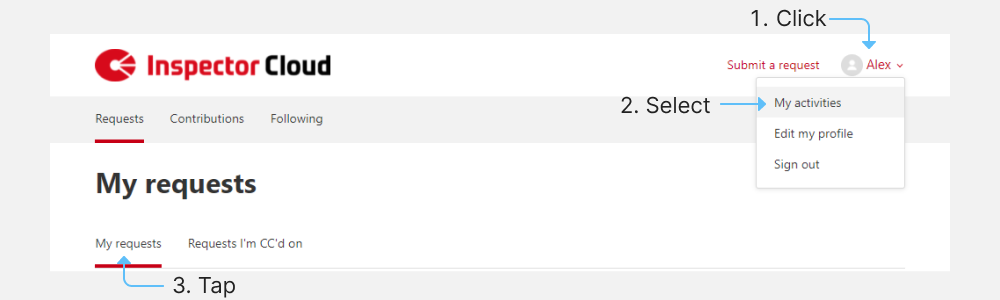
Viewing feedback in your profile
- Click and select My Activities.
- In the «Requests» window, open the «My Requests» tab, and a list of requests will open, sorted by actualization date.
The list displays information about each request.
- The Request Subject. To view the response, click on the required request in the list. If there are several responses, you will see all the correspondence on this issue.
- Request ID - unique identifier of the request. It can be used for a link to specific request, or to search in a list of other requests
- Request Created Date - Indicates the date you created the request.
- Date of Last Activity - displays the date of the last activity on your request. You can sort the list of requests by this field, .
- Request Status - indicates the status of the request:
- Open - the request has been received by the support service. In Open requests, you can add comments and explanations;
- Waiting for your response - to resolve the issue, the Support service needs your response;
- Completed - the request has been resolved and closed for comments.