How to work with tables, filters and search
Data for some sections, such as Visits, Store or Contacts, is presented as a list. Lists are interactive, hovering over a parameter in the list displays brief information about it.
If there is a lot of data in a section, you can use search by parameters or set up filters to display data.
List
The list in any of the sections displays only a part of the entries, breaking them into pages. To view the previous pages, scroll down the list and press or the page number. To return to the previous page, click .
Search
To find a specific visit, store, route, or product, you can use the search. The system searches the main fields of the section. For example, in the Store section, you can search for information by store ID, route number, chain name, address, and store name.
- Click to open the filter options.
- In the search bar, enter a search phrase and press Enter — the system will build a list based on the specified parameters.
To reset the parameters, press in the search bar or delete the search phrase and press Enter.
Note
The search takes into account the parameters that are specified in the filters. If you need to find information without taking them into account, reset filtering.
Filters
You can sort the list using the filters on the left. The presence of filters and their types depend on the section in which they are located. The filter value can be specified in different ways, depending on the data type.
- Click to open the filter options.
- Enter filter parameters manually or tap and select a value from the proposed list.
- Enter a value. For example, for the "Date" parameter, you can choose for which period to display the list:
- today,
- yesterday,
- this week,
- this month,
- last month,
- last 30 days,
- this year,
- all the time.
Note
You can also set the date manually. To do this, click on Select period and enter the dates in the "From" and "To" fields. After that, click Apply.
- If necessary, specify other options for filtering.
The list will be built according to the selected parameters.
You can specify multiple values in one filter, for example, multiple route numbers in the Route filter.
Specifying one filter affects other options. For example, if you have selected the name of a trading chain in the filter, the Channel filter will display only the retail space of this chain.
Disable filtering options
You can turn off options for filtering that you don't use.
- In the Filters tab, click .
- Uncheck unnecessary options and press Back.
Exclusion Filters
By default, all filters work in 'inclusion' mode, meaning they select all objects that match the values you specify. If you need to exclude objects based on specific criteria, you can switch the filter to 'exclusion' mode.
- Click on the desired filter
- In the dropdown menu, select Exclusion Filter mode.
Reset filters
To reset filtering options, groupings, and other options, click Reset Filters.
If you have any questions or problems, contact support.
Filter Sets
The Filters section contains a "Filter Sets" field that allows you to add your own custom filter sets for your search. It's located at the very bottom of the drop-down filter block.

This filter allows you to select, edit the name, delete/create filter sets.
Adding a Filter
To add a new filter, scroll down to the "Filter Sets" field in the "Filters" section. Click the empty field and enter the filter you want to use for your search. Click the "+" sign to create.

Once added, the filter will appear in the list.

You can edit (change the name) or delete a filter.
Deleting a Filter
To delete a filter, click the "trash" icon. Before deleting, a confirmation dialog box will appear.

Editing a Filter
To edit the name, click the «pencil» icon.

A window will open allowing you to change the filter name. Make your changes and click "Save."
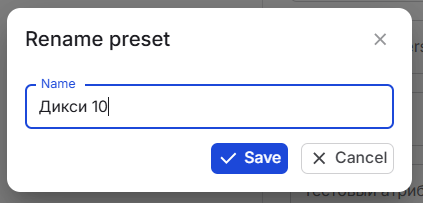
If you click "cancel" or anywhere on the screen, the changes will not be saved.