Planning visits
In the "Routes" section of the portal, managers can schedule visits to retail outlets for their subordinates and set specific days for visits.
Procedure for visiting retail outlets
To specify the order in which you'll visit stores:
- Go to the selected route.
- In the "Stores" section, click the "Order" button.
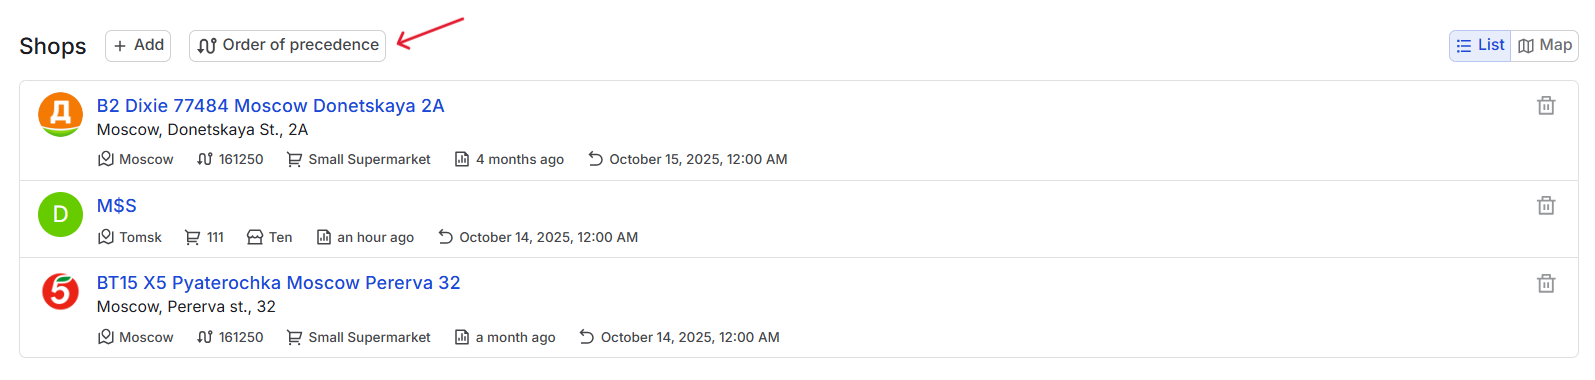
- In the window that opens, drag the stores to the desired positions using the cursor. Or, click the dots to the left of the store name and enter a sequence number for the visit.
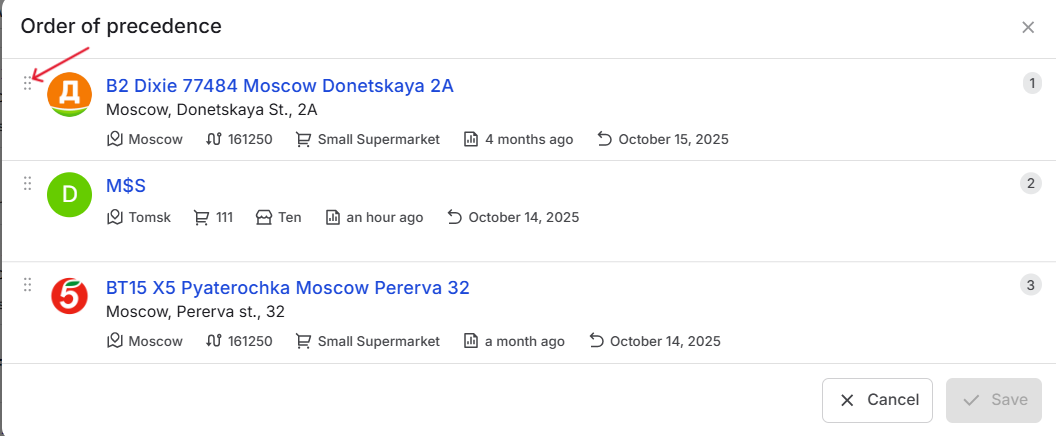
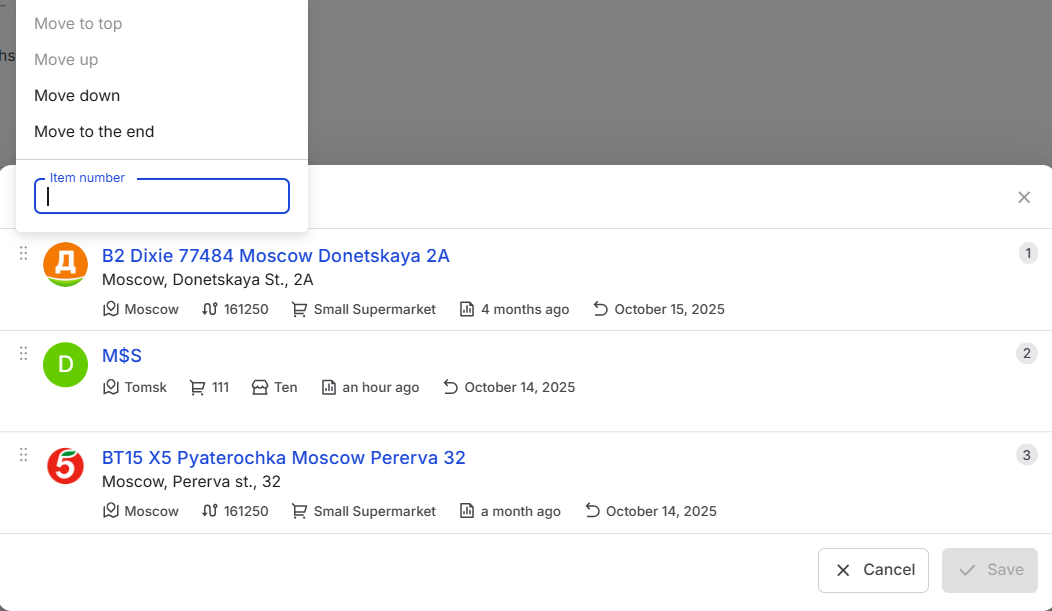
- Click Save.
Specify the date of visiting the retail outlets
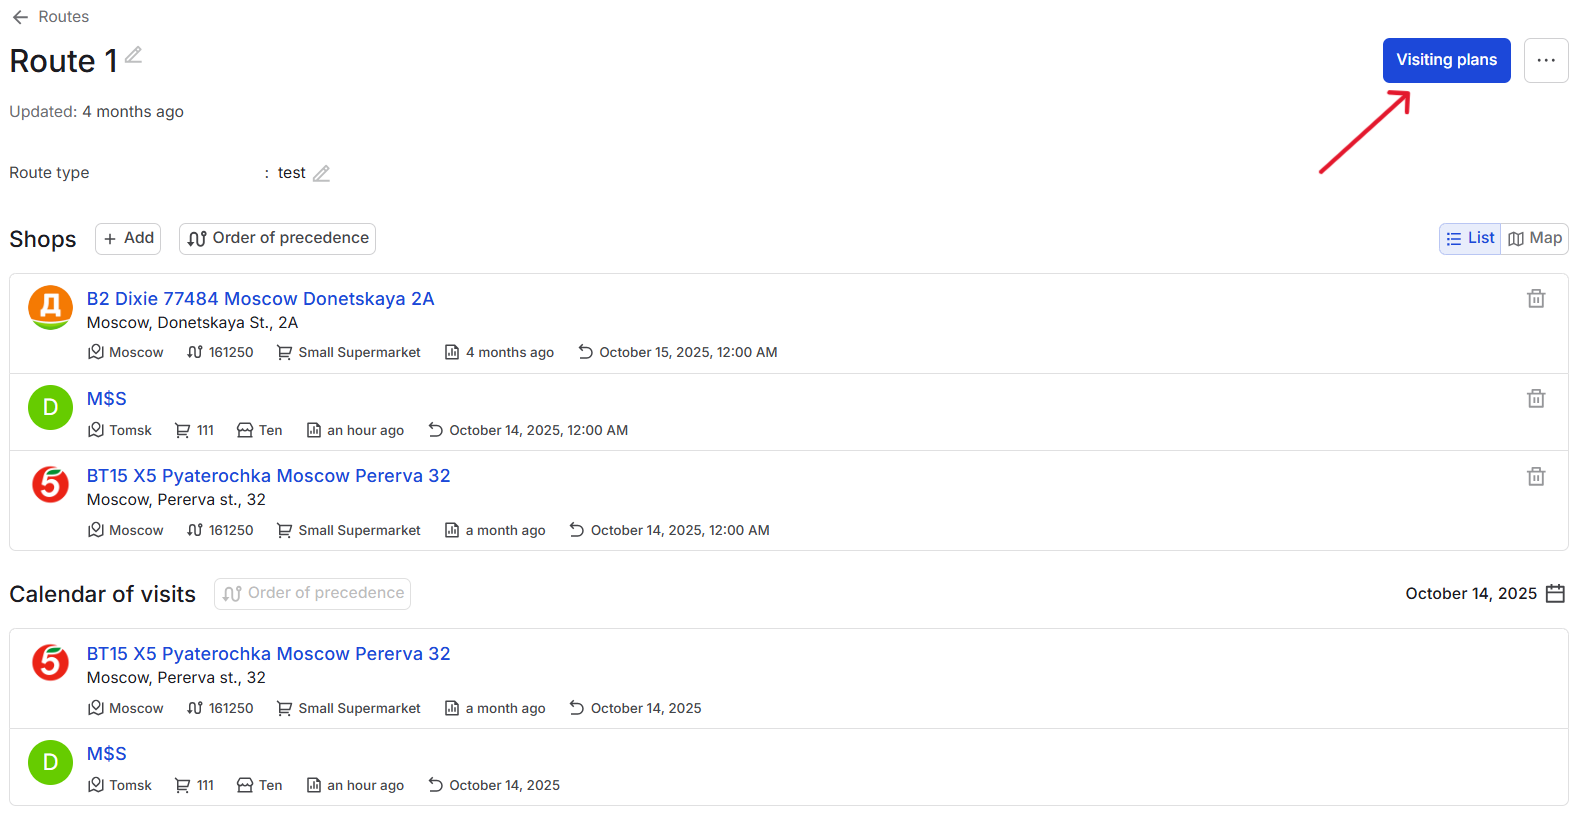
- Go to the selected route.
- To specify the date of your visit to the stores, click the "calendar" button and select the desired date.
- Then, click the "Add" button in the "Visit Calendar" section and select the stores you want to visit from the existing list. Alternatively, use the filter settings to add other necessary stores and click "Save."
- The selected stores will appear in the visit calendar.

Visiting Plans
To view the visiting plans, click the "Visiting Plans" button on the same route. A new page will open displaying the visiting plans for the retail outlets along the route.
Here you can also edit your visit plan and add or remove stores.
- Click the "Edit" button in the upper right corner of the screen.
- Select the desired location, specify the desired date, and select the store.
- Click the "Save" button in the upper right corner of the screen.
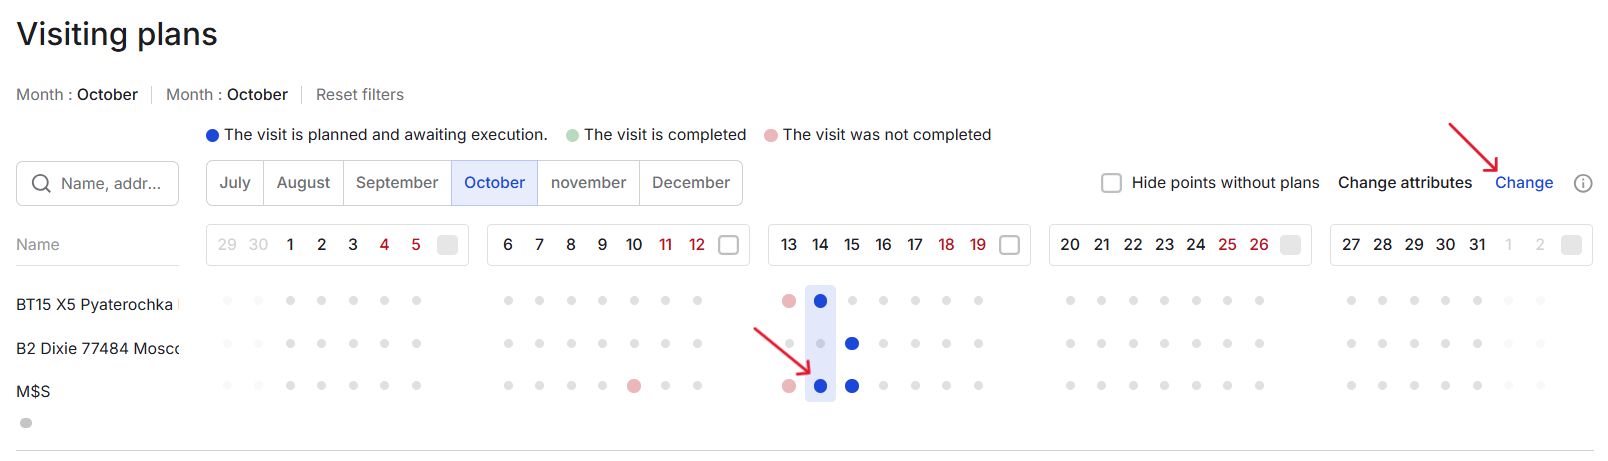
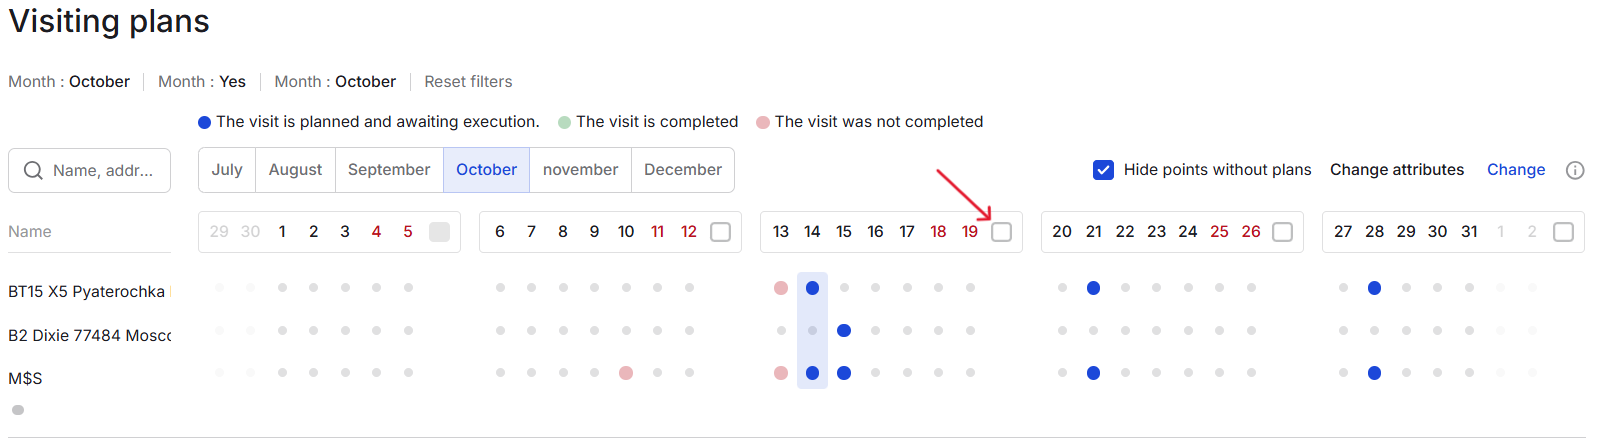
Planning in month view mode
Search module
The search works based on enabled attributes for the store list. Attributes are an editable part of the list, and the search should be tailored to the current set of attributes.
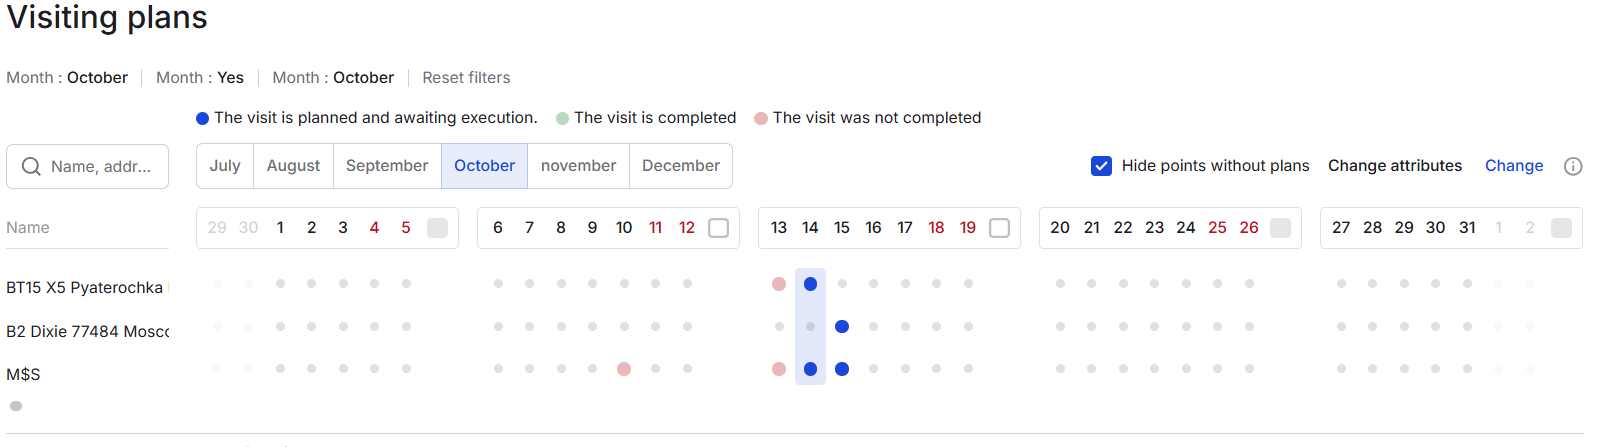
"Hide stores without plans" filter
When you enable the "Hide stores without plans" filter, the list on the left side of the interface is reorganized to display only those stores for which a visit plan has been set. On the right side of the interface, checkboxes appear under the dates.
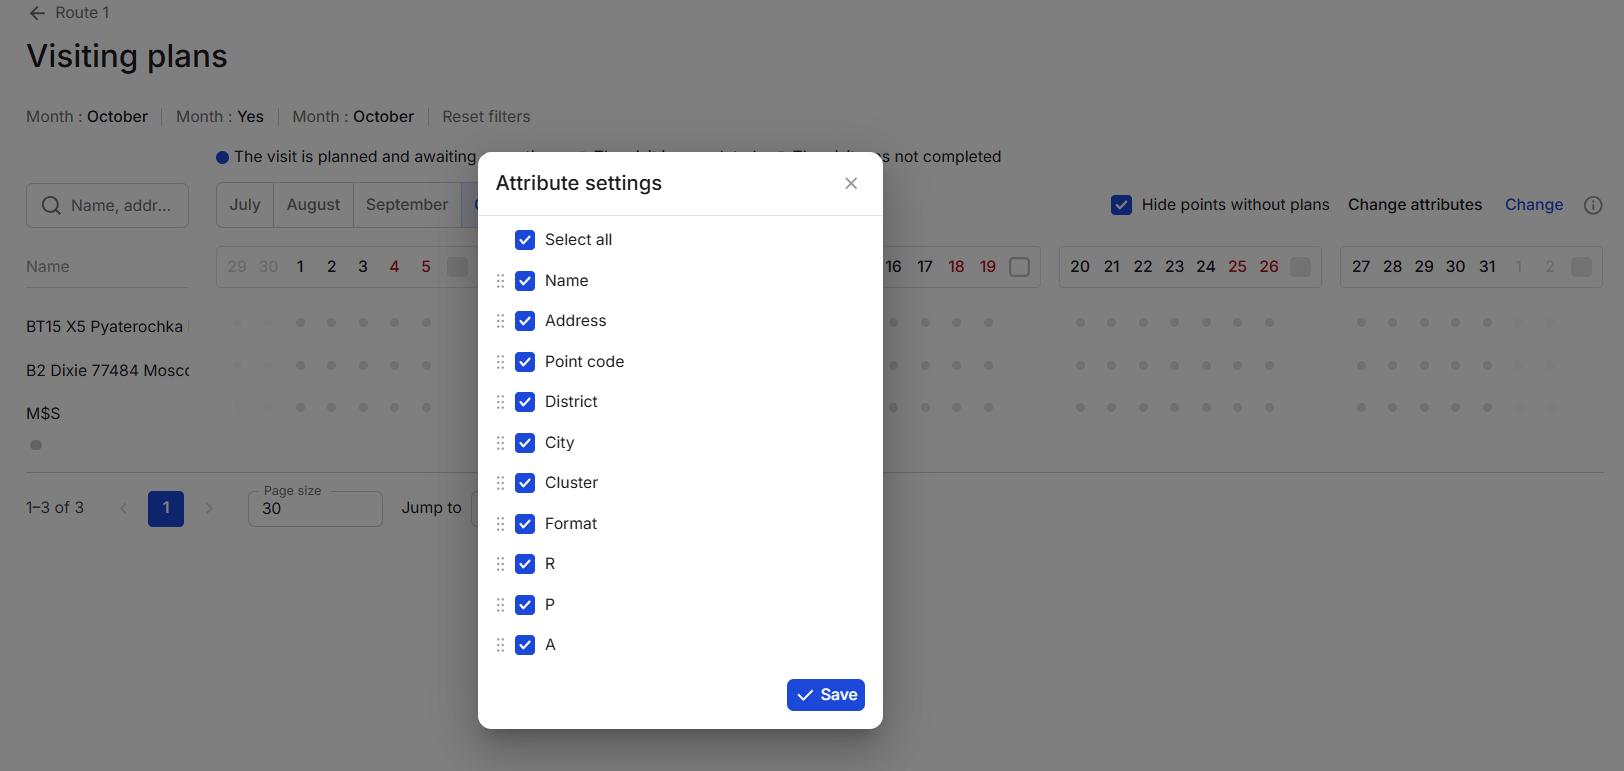
Changing the Attributes List
The "Change Attributes" button opens a pop-up window where you can enable or disable attributes for the left list. After enabling the attributes you want and disabling the unnecessary ones, confirm the changes by clicking the "Save" button. You can also close the pop-up window by clicking the "X" in the upper right corner, but this will not save the changes.
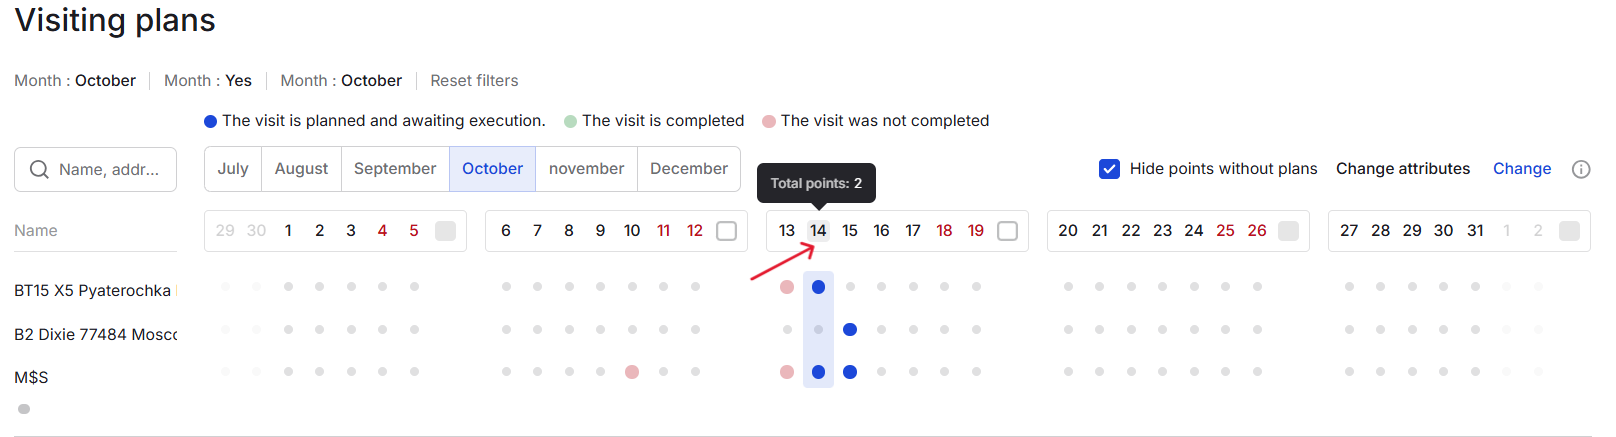
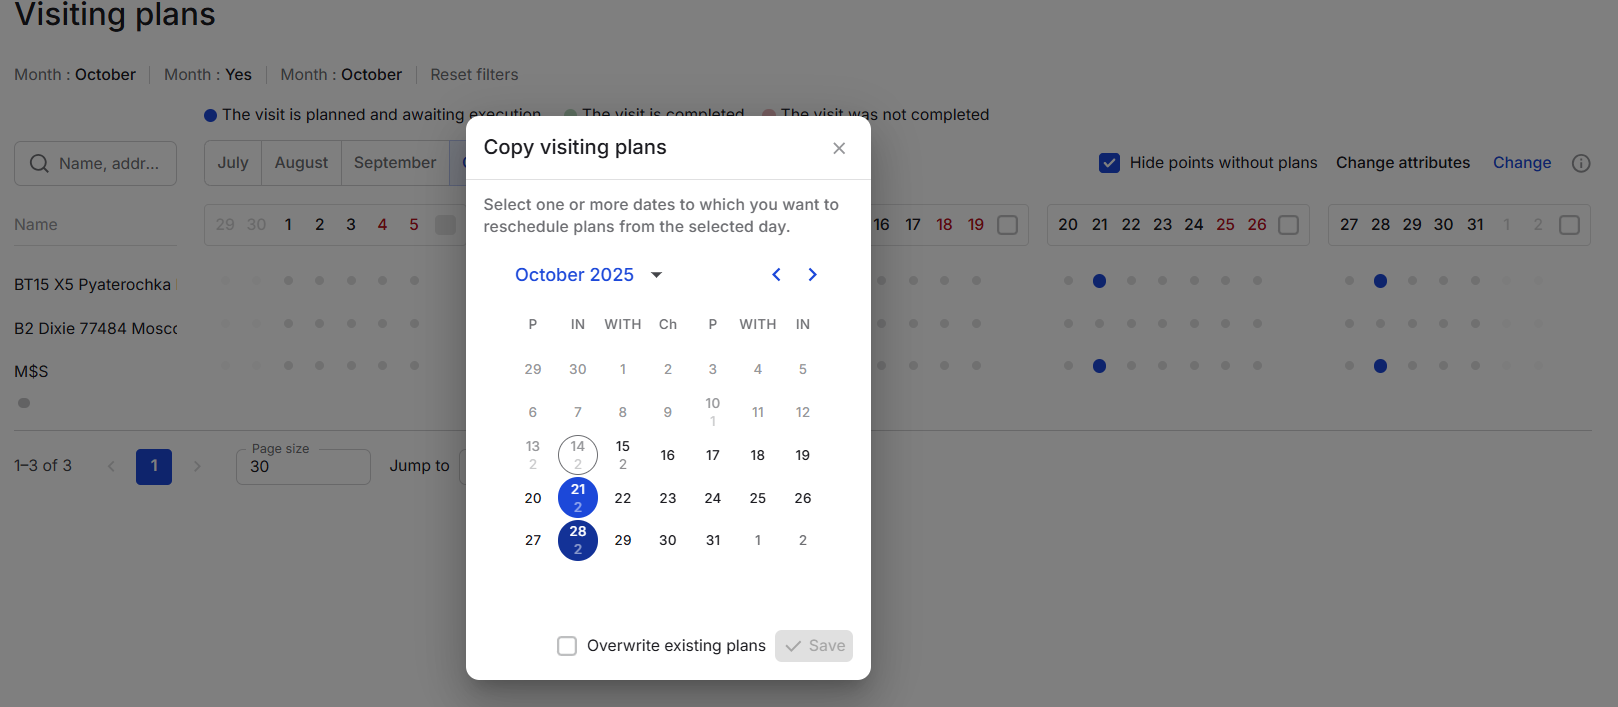
Copying plans from day
To copy plans from a day, click on the day in the date bar. A window will open in which you can select one or more dates to copy the plans. The "Save" button becomes available after you've selected at least one date to copy the plans. You can also close the window with the cross, which will not complete the copying process. When copying plans to a date(s) that already contain appointments, the system will warn you that the plans will be overwritten.
Copying plans from a week
To copy plans from a week, click the checkbox at the end of the desired week in the linear date display. A date picker will open, allowing you to select one or more weeks to copy plans. The "Save" button becomes available after selecting at least one week to copy plans. You can also close the date picker with the cross, which will not complete the copying process.
When copying plans to weeks that already contain appointments, the system will warn you that the plans will be overwritten.
When copying an incomplete week, for example, when the first day is Tuesday rather than Monday, the insertion of such a week will also begin on Tuesday of the week selected for insertion, and the system will also warn you about this.

Finishing Editing
To exit editing mode, click the "Finish Editing" button. You can exit by saving the changes from your last editing session, or by choosing not to save them in the pop-up.